Categories
Arts Culinary Arts Recipes

Taiwanese Sticky Rice (台灣油飯)

Taiwanese Sticky Rice
(台湾油饭)

Recipe

Chewy, fulfilling and aromatic sticky rice

Mushrooms gently fried at low heat gives off an umami aroma


Recipe

~2 servings

Ingredients:
Glutinous/sticky rice 糯米 1 cup
Braised pork/Chinese sausage/chicken meat 腊肉/腊肠 1/3-1/2 cup
Dried shrimp 虾米 1 tablespoon
Mushroom 香菇 3-4 pieces
Fried shallot 1-2 shallots
Spring onion 1-2 tablespoons
Garlic 蒜末 3-4 cloves
Water 3/4 cup

Seasoning:
Soy sauce (生抽/豉油/酱油) 1-2 tablespoons
Sesame oil 1-2 laddles
Salt A pinch
White pepper A pinch

Cooking:

  1. Soak the sticky rice in room temperature water for 2 hours.
  2. Soak the mushrooms for an hour.
  3. Soak the dried shrimps for 5 minutes to 30 minutes depending on the type of dried shrimps and your desired texture.
  4. Fry sliced shallot until golden brown or use pre-fried shallots.
  5. Steam drenched wet sticky rice for 20-25 minutes.
  6. Squeeze excess water out of the mushrooms and dried shrimp.
  7. Slice the meat and mushrooms; mash the garlic.
  8. Chop the dried shrimp and spring onions.
  9. With low heat, toast mushrooms until almost golden.
  10. Prepare the seasoning while waiting for the mushrooms to become fragrant and golden.
  11. Add oil if it has been adsorbed by the mushroom.
  12. Add the dried shrimp and mashed garlic, then the meat.
  13. When all are golden brown and fragrant, add water and turn to medium heat.
  14. Mix the seasoning and add in.
  15. When sauce is evaporated and thickened, stir in the sticky rice on low heat until the little remaining sauce is quickly adsorbed.
  16. Quickly stir in the fried shallot and turn off the heat before the individual rice grain overcooks into mush.
  17. Sprinkle some chopped spring onion.
  18. Serve and ready to eat.
  19. Can be chilled up to 2-3 days.

Notes

Taiwanese Sticky Rice in Chinese, 油饭, actually means “oil rice” because of the moist and shiny surface of the dish. However, the glistening effect still can be achieved with less oil because the moist look is actually from the water in the evaporated sauce. This is a common family dish and well-known recipe in Taiwan. You may also add dried tofu or dried bean curd (腐竹) if desired.

Tip off: It is challenging to prepare this dish with distinguished grains without mushing them up. Slightly overcooked or overwetted during the cooking process can end up in a a soft, wet, pulpy mass. The secret is in the cooking steps above (i.e. volume control of water, how concentrated the thickened sauce is before adding the rice), which will give you separated individual grains yet at the same time a more chewy texture.

Rating

台湾油饭
Taste: ♥♥♥♥♥♥ (5 out of 5)
Health: ♥♥♥ (3 out of 5)
Cost: ~RM6-7 per serving
*Rated in year 2021.

Categories
Arts Culinary Arts Recipes

Chinese Steamed Bun (饅頭)

Chinese Steamed Bun (馒头)

Recipe

Tasty and warming treat for cold weather or busy in-between meals


Recipe

Ingredients:
Flour 200 g
Milk 120 g
Sugar 20 g
Yeast 2 g

Cooking:

  1. Knead all ingredients together until smooth.
  2. Leave for 10 to 15 minutes.
  3. Knead firmly into a square with a rolling pin, then lightly roll into a cylinder.
  4. Cut into cubed sizes.
  5. Leave to raise by two folds.
  6. Steam for 8 minutes.
  7. Serve or freeze until next serving.

Notes

The Chinese steamed bun is also known as mantou (馒头).

Tip off: You can actually freely add fillings if preferred, but filled buns usually replace milk with water in the recipe.

Rating

馒头
Taste: ♥♥♥♥♥ (4 out of 5)
Health: ♥♥♥ (3 out of 5)
Cost: ~RM1 per 3 pieces
*Rated in year 2021.

Categories
Arts Culinary Arts Recipes

Herbal Mutton Soup (藥材慢燉羊肉湯)

Herbal Mutton Soup

Recipe

Healthy and warming treat for cold weather

Tender mutton from tough cuts that still falls apart tantalisingly

Suitable for people who are prone to feeling cold

Four-hour simmered herbal beef soup


Recipe

Ingredients:
Mutton/Beef/Chicken
茯苓 Poria cocos (Fr.)Wolf.
莲子 Nelumbo nucifera
芡实 Euryale ferox Salisb.
淮山 Dioscorea opposita Thunb.
*~10-20g per serving.

Seasoning (upon preference):
Soy sauce (生抽/豉油/酱油)
Salt
White pepper
Black pepper (optional)
Mashed garlic – half clove/serving (optional)

Cooking:

  1. Brown mutton, beef, or chicken meat very slightly in pan if using slow cooker.
  2. Bring water to a boil.
  3. Add all ingredients and mashed garlic into the boiling water.
  4. Simmer on low heat for 2 hours on kitchen stove. Alternatively, 4 hours and 6 hours in slow cooker on high and low heat, respectively.
  5. Add remaining seasoning and stir.
  6. Serve hot in a bowl.

Notes

Another name for this dish is Four Gods Mutton Soup (四神炖羊肉湯). The four herbs, thus four gods, used in this dish are known for their incredibly important medical function in removing dampness (祛湿), according to traditional Chinese medicine research that dates back more than 2,200 years ago.

Tip off: Noodles can be added to make herbal soup noodles. This dish is usually served with a small bowl of rice during cold weather or winter. Even the toughest cheapest mutton/beef cuts can be used for this dish.

Personal notes: 【中醫學】在陽旺之軀胃濕恆多,在陰盛之體脾濕亦不少 – 在脾的濕邪主要表現為舌淡苔白膩,頭蒙如裹,口不渴、脘痞、腹脹、四肢困倦重濁、大便溏洩。在胃的濕邪表現為舌紅苔黃膩,頭腦不清醒,咽部不適,口粘、口苦,納差、胸悶、胃部不適、口渴不欲飲,大便粘滯不爽等。

baike.baidu.com

Translation: [Traditional Chinese Medicine] In the body of yang, there is a lot of dampness in the stomach, and in the body of yin, there is a lot of dampness in the spleen – The dampness in the spleen is mainly manifested as pale tongue with white coating, lack of thirst, bloating, swollen and tired limbs, loose stool. Dampness in the stomach is mainly manifested as red tongue with yellow coating, slow mind, throat discomfort, sticky mouth, bitter mouth, anorexia, chest tightness, upset stomach, thirsty but unwilling to drink, sticky stool.

baike.baidu.com

Rating

药材羊肉汤
Taste: ♥♥♥♥♥♥ (5 out of 5)
Health: ♥♥♥♥♥ (5 out of 5)
Cost: ~RM6-7 per bowl
*Rated in year 2021.

Categories
Arts Culinary Arts Recipes

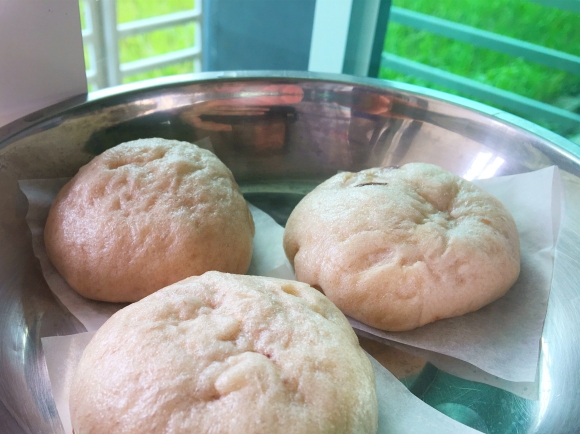
Taro Pao | Mashed Taro Ball (芋頭包|芋泥球)

Taro Pao | Mashed Taro Ball

Recipe

Two menus; two recipes!

Breakfast Tea Time Menu

Homemade and freshly steamed hot pao

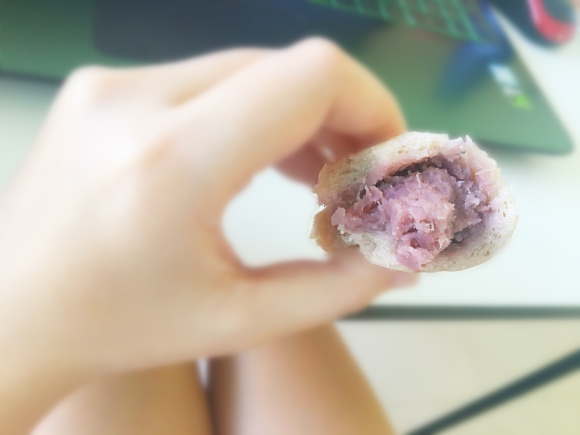
Fluffy pao with generous filling of 100% taro mash and cubes

Dessert Menu

Delightful mixture of mashed taro,butter, sugar, and salt
– route to heavenly mashed taro ball!

The first time I tried these chilled mashed taro balls in Taiwan I immediately fell in love with it!


Recipe

Taro pao skin
(amount by preference unless specified):
Mashed steamed taro (based on your desired number of 3-inch pao)
Cubed raw taro
Flour (based on your desired number of 3-inch pao)
Yeast (1/100 of flour)
Milk or water (1/3 of flour)
Salt
Sugar

Taro pao filling
(amount by preference unless specified):
Mashed steamed taro (based on your desired number of 1.5-inch balls)
Cubed raw taro
Butter (1/10 of taro or as desired)
Salt
Sugar

Mashed taro ball ingredients
(amount by preference unless specified):
Mashed taro (based on your desired number of 1.5-inch balls)
Butter (1/4 of taro)
Salt
Sugar

Cooking of taro pao:

  1. Prepare the cubed raw taro. Separate the cubed taro into two appropriate portions to be used in Step 7 and Step 11.
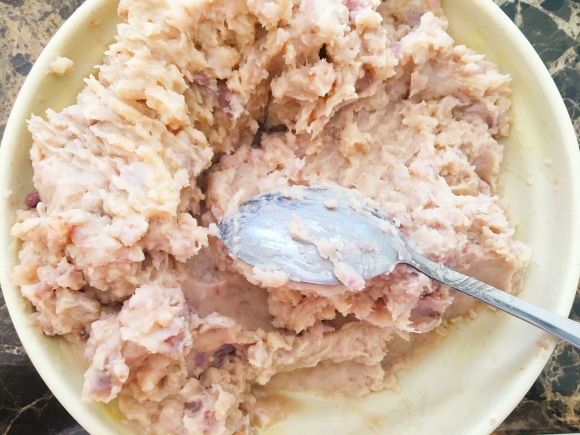
  2. Prepare the mashed steamed taro by steaming and mashing with a fork. Separate the mashed taro into two appropriate portions to be used in Step 5 and Step 7.
  3. Mix the flour, water, yeast, milk, salt, and sugar in a bowl.
  4. Knead the mixture into a dough.
  5. Knead the dough and a portion of mashed taro together until they are thoroughly mixed.
  6. Leave the dough aside for 45 minutes to rise.
  7. For the pao filling, mix the butter, salt, and sugar into the remaining mashed taro. Stir in the cubed raw taro.
  8. Divide the dough into moderately sized balls, and then roll them flat to make the pao skin.
  9. Enclose the pao skin over the taro pao filling.
  10. Stick a few cubed taro over the top of the pao.
  11. Steam for 10 minutes and leave pao in pot for 5 minutes to cool and prevent shrinking.
  12. Serve hot or freeze to store up to a month.

Cooking of mashed taro ball:

  1. Prepare enough mashed taro for the desired number of 1.5-inch balls.
  2. Thoroughly mix all listed ingredients of mashed taro ball and roll mixture into individual 1.5-inch balls.
  3. Store in freezer up to a month, and chill in refrigerator prior serving.
  4. Serve chilled on tart foil.

Notes

I made taro pao and mashed taro balls because I love natural taro-related food but it is not conveniently sold in Malaysia. Most taro-related food here contains too much sugar, colouring, and flavouring.

Taro pao’s tip off: Stick finger into dough, dough rising is completed when it does not re-inflate. I prefer to prepare a lot of taro pao to store in the freezer so that I can conveniently steam a couple of pao for breakfast before I head out.

Mashed taro ball’s tip off: If you have tried mashed taro balls in Taiwan and miss the taste, my recipe produces a superbly similar result.

Rating

taro pao
Taste: ♥♥♥♥♥ (5 out of 5)
Health: ♥♥♥♥ (4 out of 5)
Cost: ~RM2-3 per pao
*Rated in year 2020.

mashed taro ball
Taste: ♥♥♥♥♥ (5 out of 5)
Health: ♥♥♥♥ (4 out of 5)
Cost: ~RM1-2 per ball
*Rated in year 2020.

Categories
Arts Culinary Arts Recipes

Char Kuey Teow (炒果條)

Char Kuey Teow

Recipe

Springy prawns and aromatic Chinese sausage

Slightly browned noodle edges… yummy…


Recipe

Eggs
He fen (河粉)
Bean sprouts (豆芽)
Chopped scallion (葱葉)
Shelled cockle (shell removed) (血蛤) (Optional)
Sliced Chinese sausage (腊肠) (Optional)

Seasoning (upon preference):
Oyster sauce (蚝油/蠔油)
Soy sauce (豉油/酱油)
Sesame oil (麻油)
Finely chopped garlic
White pepper
Pork oil (豬油) (Optional)
A thin slice of ginger (Optional)

Preparation:

Mix all seasoning in a bowl except garlic and ginger.
Cut the ingredients where specified and heat oil in pan.
Add the garlic and ginger.
Add the cockle and Chinese sausage when garlic is slightly browned.
When almost cooked, add the bean sprouts, and then add the noodles soon after.
Push noodles aside and fry eggs on a side of the wok.
Add in the remaining seasoning.
Stir fry the ingredients in the wok until noodle edges are slightly golden brown or charred to preference, add the scallion.
When the scallion starts releasing its aroma, plate the noodles and serve hot on a plate lined with a cut piece of banana leaf.

Notes

【中医学】血蛤味甘性温,功能除了补血外,还可以润五脏、健胃、清热化痰、治酸止痛,主治痰热咳嗽、胸胁疼痛、痰中带血等。
Translation: [Traditional Chinese Medicine] Cockles are warm in nature. They help to regenerate blood, moisturise the five main organs, invigorate the stomach, clear heat, resolve phlegm, relieve soreness and pain, treat heat-induced cough and chest pain.

Rating

炒果條
Taste: ♥♥♥♥♥ (5 out of 5)
Health: ♥♥♥ (3 out of 5)
Cost: ~RM4-5 per plate
*Rated in year 2020.

Categories
Arts Culinary Arts Recipes

Taro Ball Tang Yuan (芋頭湯圓/芋圓)

Taro Tang Yuan

Recipe

Springy, chewy & sweet taro balls suitable for dessert

Welcome winter solstice with body-warming taro balls in ginger black sugar soup


Recipe

Number of balls: ~20
Ingredients (Amount up to preference unless stated):
Ginger
Black sugar (黑糖) (Sweetness is half than that of white sugar)
Cubed taro (芋头)
Glutinous rice flour (糯米粉) 2 cups
Water 1 cup
White sugar
Salt

Preparation:

  1. Boil hammered or sliced ginger in a pot of water, and then add black sugar when the water has been infused with ginger.
  2. White sugar may be added for more sweetness. Standard tang yuan soup is as sweet as cake. A slight dusting of salt is optional to discreetly tease taste buds.
  3. Steam and mash the cubed taro.
  4. Mix salt and sugar into the mashed taro. Make sure salt and sugar is enough for adequate flavour later when kneaded with the flour. The taste of taro balls are usually either slightly salty or sweet.
  5. Mix flour and water at a 2:1 ratio into a moderate consistency. Knead dough with mashed taro. Add water when dough cracks.
  6. Roll dough into small uniform balls. They are typically served small (1/2 in) or moderately sized (1 in).
  7. Boil taro balls in boiling water, floating balls are done.
  8. Serve taro balls in a bowl of ginger black sugar soup.

Notes

Taro tang yuan (芋头汤圆) is also known as taro ball (芋圆). Tang yuan balls and soup are quite customisable. There are ginger white sugar soup and soy bean soup; there are also non-flavoured tang yuan balls with either no filling, peanut, black sesame, or red bean filling.

Rating

芋頭湯圓
Taste: ♥♥♥♥♥ (5 out of 5)
Health: ♥♥♥♥ (4 out of 5)
Cost: ~RM2-3 per bowl
*Rated in year 2020.

Categories
Arts Culinary Arts Recipes

Okonomiyaki (大阪燒)

Okonomiyaki

Recipe

Preparation of okonomiyaki mixture prior frying

Golden and crispy coating… yummy…


Recipe

Mixture (Amount based on preference unless stated):
Minced pork
Minced chicken
Cubed carrot
Cubed cabbage
Cubed jícama (凉薯/沙葛)
Cubed Chinese mushroom (冬菇/黑古)
Chopped Chinese chives or scallion (韭菜/葱葉)
Finely chopped dried prawn (虾米)
Flour (Half of the mixed ingredients above)
Cornstarch (If crispy coating is desired)
Water (3/4 of flour)

Seasoning (Amount based on preference):
Oyster sauce (蚝油)
Soy sauce (生抽/豉油/酱油)
Sesame oil (麻油)
Fried onion oil (葱油)
Sliced ginger
Mashed garlic
Mashed onion
Black pepper
White pepper

Drizzle (Amount based on preference):
BBQ Sauce
Mayonnaise
Katsuobushi/Bonito flakes (鰹魚乾/柴魚)

Pan-fry the okonomiyaki!

Preparation:

  1. Marinate meat overnight in refrigerator in advance if desired.
  2. Prepare the mentioned mixture and seasoning into a bowl.
  3. Heat oil in a frying pan and layer a circle of the entire mixture onto the pan.
  4. Dust the top with some cornstarch for crispier coating.
  5. After ~4 minutes depending on the size of the okonomiyaki, flip over and fry for another 4 minutes on medium heat.
  6. Fry both sides on high heat for about 30 seconds for the enhanced crispiness and slightly charred aroma.
  7. Add the drizzle and serve piping hot.

Notes

Okonomiyaki is a highly customisable dish – we can select the ingredients as we like and add the flour in when satisfied. The recipe provided is just a selection of typical okonomiyaki ingredients used in Asia. Feel free to even adjust the consistency of the flour for a firmer or softer crunch sensation. Okonomiyaki is actually just grilled pancake that means “grill as you like”.

Rating

大阪燒
Taste: ♥♥♥♥♥ (5 out of 5)
Health: ♥♥♥ (3 out of 5)
Cost: ~RM4-5 per standard okonomiyaki
*Rated in year 2020.

Thanks for visiting my post! Feel free to leave feedback or questions in the comment box below.

Categories
Arts Culinary Arts Recipes

Pan-fried Dumplings (煎餃)

Dumpling

Recipe

Succulent dumpling with squirting liquid
when I took a bite!

Golden and crispy bottom layer… yummy…


Recipe

Dumpling wrapper/skin:
Flour (an avg. fishball size per dumpling)
Boiling water (a third of flour)

Dumpling filling (an avg. fishball size per dumpling):
Minced pork & minced prawn x 40-60% of filling
Cubed carrot
Cubed jícama (凉薯/沙葛)
Cubed Chinese mushroom (冬菇)
Chopped Chinese chives (韭菜)
Finely chopped dried prawn (虾米)

Filling seasoning (upon preference):
Oyster sauce (蚝油)
Soy sauce (豉油/酱油)
Sesame oil (麻油)
Fried onion oil (葱油)
Mashed ginger
Mashed garlic
Mashed onion
Black pepper
White pepper

Filling preparation:
Prepare the mentioned ingredients into a bowl. Store overnight in refrigerator to marinate.

Dough preparation:
Mix flour and boiling water roughly into an approximate dough and leave till cool enough to knead into a coarse ball. After 30 minutes, re-knead the dough into a smooth ball.

Divide the dough into desired quantity and size(s). Flatten the dough into a circular shape and place onto it the maximum amount of filling that it can wrap. You may wet the edges to seal the wrapper properly. Constantly keep dough or wrapper covered with wet cloth.

Pan-fry the dumplings!

  1. Place dumplings on a heated non-stick pan with hot oil.
  2. Turn on to medium heat and add water (or flavoured soup) to a level 2/3 of frozen dumplings or 1/2 of freshly wrapped dumplings.
  3. Once boiling, place lid on the pan. Simmer the dumplings by turning to low heat for 5±2 minutes depending on dumpling size or the type of meat filling used.
  4. Fully or partially remove the lid (oil and stuff will jump out at you.. haha..), then turn to medium heat to dry out the water.
  5. When the water is almost dried out to ~1/4 inch, turn to high heat to pan-fry the underside of the dumplings only, without flipping the them.
  6. Quickly remove the dumplings once their underside is golden brown.
  7. You may place the dumplings upside down on the plate to keep the dumpling’s underside crispy.

Notes

Common dumpling is simple – the filling is only made up of pork, chives, and similar seasoning as mentioned above. This is a highly customisable dish – we can adjust the filling ingredients as we like and wrap the dumpling in any pattern. The recipe for the dumpling filling is just what I would put inside. I sometimes use room temperature water instead of boiling water when I want chewy dumpling skin. This dish is very similar to potstickers (锅贴).

Rating

煎饺
Taste: ♥♥♥♥♥ (5 out of 5)
Health: ♥♥♥ (3 out of 5)
Cost: ~RM3-4 per dumpling
*Rated in year 2020.

Thanks for visiting my post! Feel free to provide any feedback, like are you going to try out this recipe, suggest alternative filling/coating, comment about the taste/steps, or ask questions.

Categories
Arts Culinary Arts Recipes

Tiramisu

Tiramisu

Recipe

冷軟甜。。。是甜點愛好者的幸福

帶酒味的提拉米蘇撒上椰絲和奧利奧


Recipe

A) Making of tiramisu cream layer

i) Prepare ingredients:
Egg yolk x 15%
Egg white x 15%
Whipping cream x 30%
Mascarpone cheese x 30%
Sugar x 10% or of desired sweetness
Rum (of desired amount)
Salt (to taste)

ii) Double boil and stir continuously yolk and part of sugar till a pale yellow colour and creamy texture is achieved.

iii) Whisk in mascarpone cheese. Whisk egg white, salt, and remaining sugar till foamy, add into mixture. Whisk whipping cream till texture is creamy, add into mixture. Beat rum into mixture.

B) Making of tiramisu biscuit layer

i) Prepare ingredients (according to container size and number of layers):
Plain-flavoured biscuit (e.g. ladyfinger)
Espresso or concentrated coffee
Rum

ii) Whisk coffee and rum.

iii) Soak biscuit in coffee until desired texture/sogginess.

iv) Line bottom layer with soaked biscuits, then alternate between the cream mixture (A) and the biscuit-coffee mixture (B) repeatedly to form mutiple layers.

Notes

The next dessert my cousin Jia Li wanted to try was tiramisu, a coffee-flavoured Italian dessert, which was much easier than the daifuku we did couple days ago. We spent 6 hours making the latter but only 3 hours making tiramisu. Three hours is a long time but better be careful than sorry to avoid wastage. I’m glad we had small glass cups as the visible layers gave the dessert servings a classier appearance.

I think that this simple dish is easy to be modified to personal preference, such as by replacing the mascarpone cream with matcha cream, or the ladyfingers with oreo.

Taste: ♥♥♥♥♥ (5 out of 5)
Health: ♥♥ (2 out of 5)
Cost: ~RM3-4 per serving
(depends on serving size)
*Rated in year 2020.

Thanks for visiting my post! Feel free to provide any feedback, like are you going to try out this recipe, suggest alternative filling/coating, comment about the taste/steps, or ask questions.

Categories
Arts Culinary Arts Recipes

Daifuku (雪媚娘/大福)

Daifuku

Recipe

又冷又軟的冰皮抹茶巧克力大福

有些甜中帶苦
有些甜中帶酸
有些。。。甜中帶貓山王


Recipe

A) Making of daifuku snow skin

i) Mix and steam ingredients till cooked (15-30 minutes):
1. Glutinous rice flour x 30%
2. Corn starch x 10%
3. Sugar x 10%
4. Milk x 50%

ii) Steam the ingredients in a container that is lidded or sealed with perforated cling wrap to prevent over-evaporation of mixture.

iii) Leave to cool a while before kneading a little oil or unsalted butter into the glutinous rice flour dough. Next, chill the dough thoroughly for easier handling.

iv) Cut the dough into individual portions, then flatten the dusted dough with a dusted rolling pin on a cling wrap.
Suggetion: Add fillings onto the dusted side (top side) so that the sticky side (under side) can be dusted with desired coatings.

v) After wrapping the filling up, you may coat the daifuku by sprinkling and patting some slightly roasted glutinous rice flour, icing sugar, or icing onto the skin for a “snow skin” or 冰皮 effect.

vi) Serve chilled. Prior serving, you may decorate the top with sliced rose petals, orange zest, chocolate shaving, cocoa powder etc.

Additional optional steps:

After mixing, you may choose to 1) leave aside for 10 minutes for contents to fully dissolve, and 2) sieve contents for a smoother texture.

For desired taste & texture, adjust ratio according to personal preference.

B) Making of daifuku filling

i) Prepare sugar-added whipped cream of any desired flavours, e.g. original, matcha, vanilla, chocolate, durian, banana, orange, mango etc.

ii) Prepare cubed fruits of any choice. Fruits can be replaced with favourite fillings, e.g. oreo, dark chocolate chips, etc.

iii) Layer or multi-layer the desired fillings onto your flattened daifuku snow skin as desired. Wrap up into a ball and pinch the skin to seal.

Notes

Today my cousin Jia Li suggested making daifuku so we purchased and prepared the ingredients together. We are beginners when dealing with glutinous rice flour so it took 6 hours fumbling with the dough and filling to make it look at least presentable, haha. It looked deceivingly easy on all the YouTube videos.

Traditional daifuku is filled with original whipped cream and cubed fruit, then dusted with roasted glutinous rice flour. Variations suggested were in consideration of subjective personal preferences. The glutinous rice flour skin stretches hence tears easily.

Taste: ♥♥♥♥♥ (5 out of 5)
Health: ♥♥ (2 out of 5)
Cost: ~RM3-4 per serving (still depends on size)
*Rated in year 2020.

Feel free to provide any feedback, like are you going to try out this recipe, suggest alternative filling/coating, comment about the taste/steps, or ask questions.